Download Oracle Virtual Box
Virtual-Box is a cross-platform virtualization application. What does that mean?
For one thing, it installs on your existing Intel or AMD-based computers, whether they are running Windows, Mac,Linux or Solaris operating systems.
Secondly, it extends the capabilities of your existing computer so that it can run multiple operating systems (inside multiple virtual machines) at the same time.
So, for example, you can run Windows and Linux on your Mac, run Windows Server 2008 on your
Linux server, run Linux on your Windows PC, and so on, all alongside your existing applications.
You can install and run as many virtual machines as you like — the only practical limits are disk
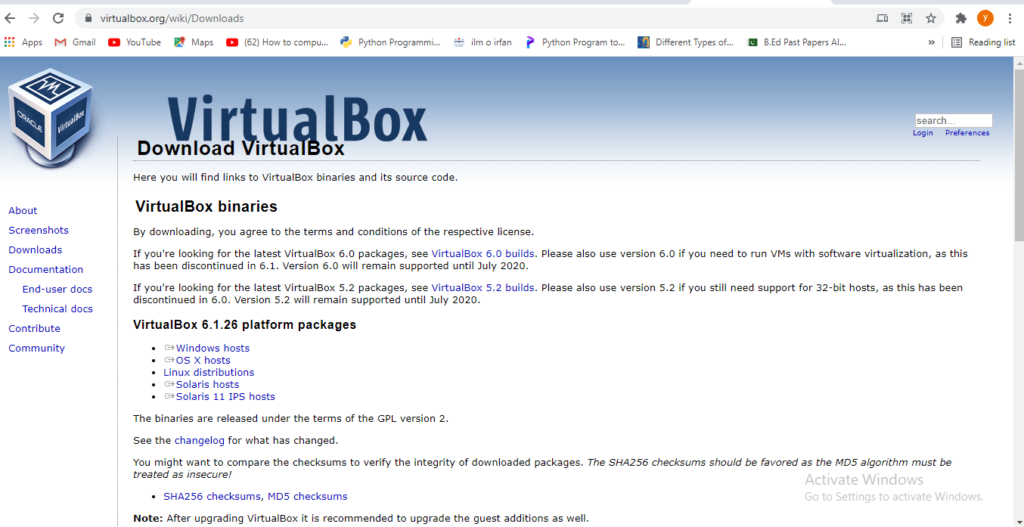
space and memory. Virtual-Box can be downloaded from https:// www.virtualbox.org/ wiki/
Downloads for free.Go to VirtualBox website to download the binary for your current operating system. Since our host machine is running on Windows, I’ll choose Windows hosts.
Installing Ubuntu on VM
Before installing the Ubuntu, we need to ensure that Virtual-Box has been installed on the machine
and a compatible version of Ubuntu has been downloaded. To install Ubuntu on VM we need to
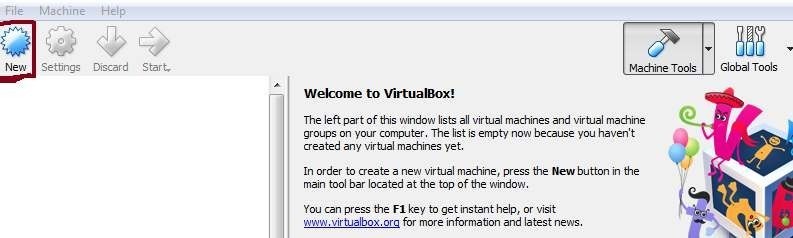
create a virtual machine on Virtual-Box. The process to create a VM on Virtual-Box is given below.
Step 1: Start the Virtual-Box and click the new button to start creating a new VM
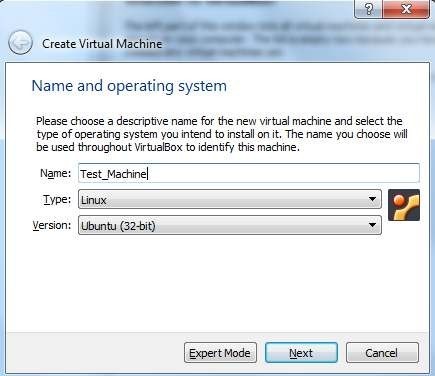
Step 2: Enter the basic information and press Next
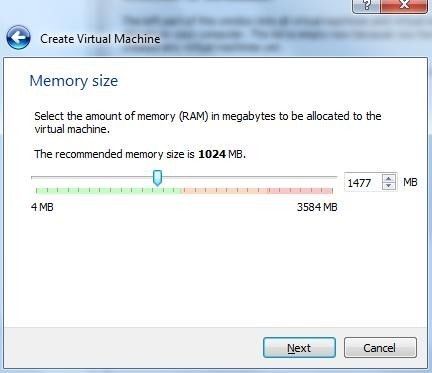
Step 3: Select the memory for your VM and press Next
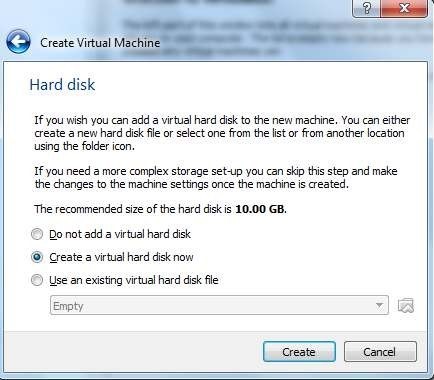
Step 4: Add hard-disk to your VM and press Create button
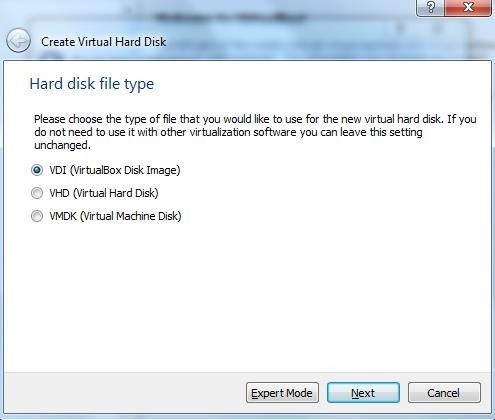
Step 5: Select the hard disk file type and press the Next button
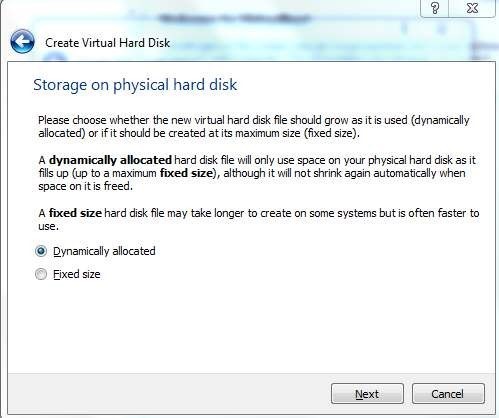
Step 6: Select the storage type on Physical hard disk and press Next
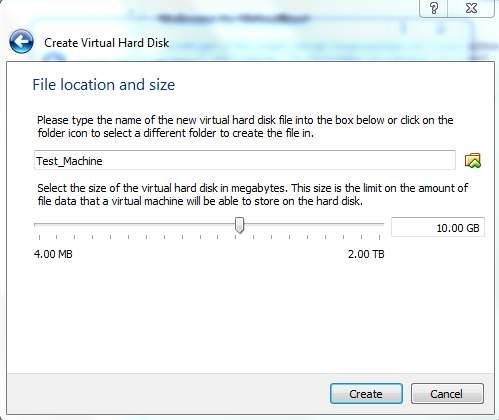
Step 7: Select the location and size on physical hard disk to store the VM and press the Create
button
It completes the creation process of VM on Virtual-Box. The newly created VM can be seen on main
screen
To install Ubuntu on the newly created VM, we need to attach the Ubuntu installation file with it. It
can be done as given below.
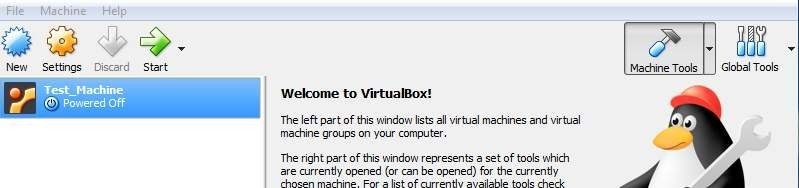
Step 1: Select the VM on main screen of Virtual-Box and click the settings button. The following
window will appear.
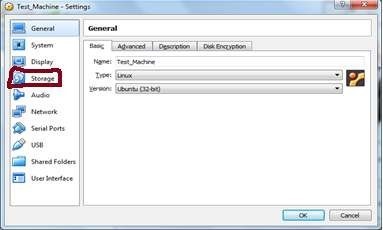
Step 2: Select the storage button as highlighted in the above figure. The following window will
appear
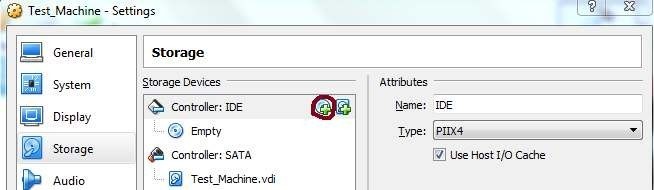
Step 3: Select + button (as highlighted in above figure) and browse and select the Ubuntu
installation file downloaded earlier. Now, press the OK button to complete the process of attaching
Ubuntu with VM.
Once the VM has been created and Ubuntu Installation file is attached with it, we can start the
installation process. To do this, select the VM on main window of Virtual-Box and click the start
button as given below.

Now, the booting process will start and the following window will be appeared.
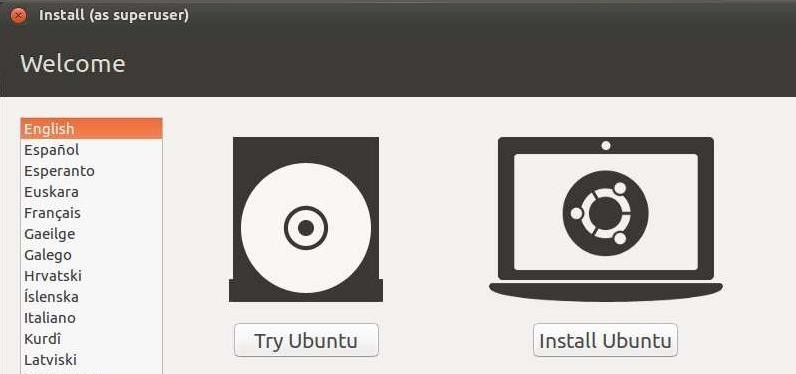
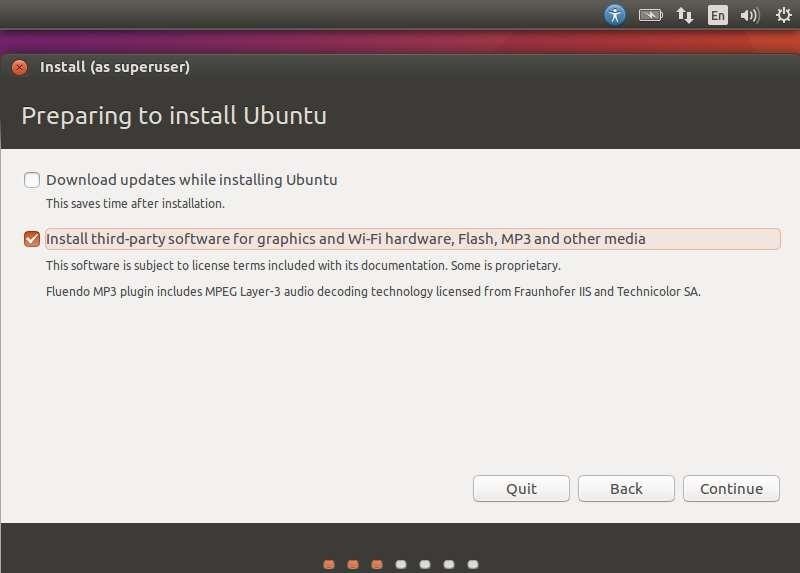
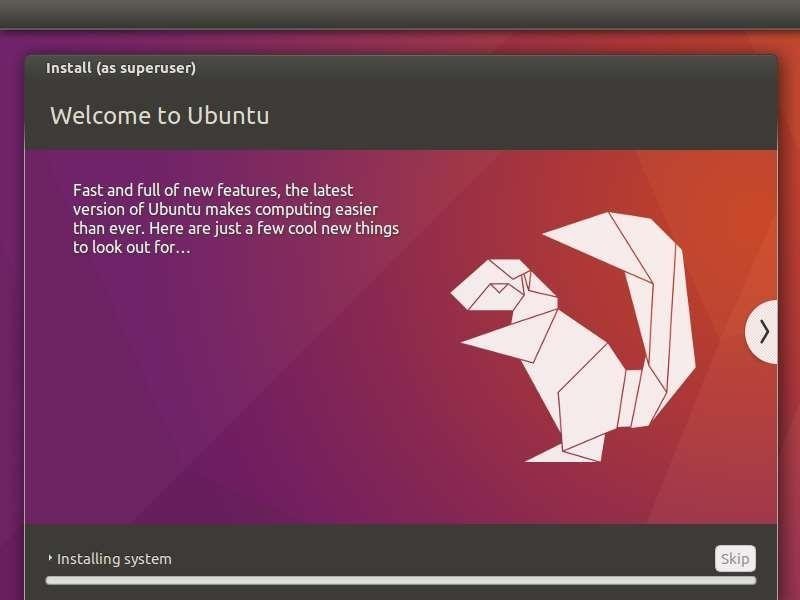
Here, we can try the Ubuntu without installing. To install Ubuntu, click Install Ubuntu button. The
next screen gives you 2 options. One is to download updates in the background while installing and
the other is to install 3rd party software. Check the option to install 3 party software. Then click the
Continue button
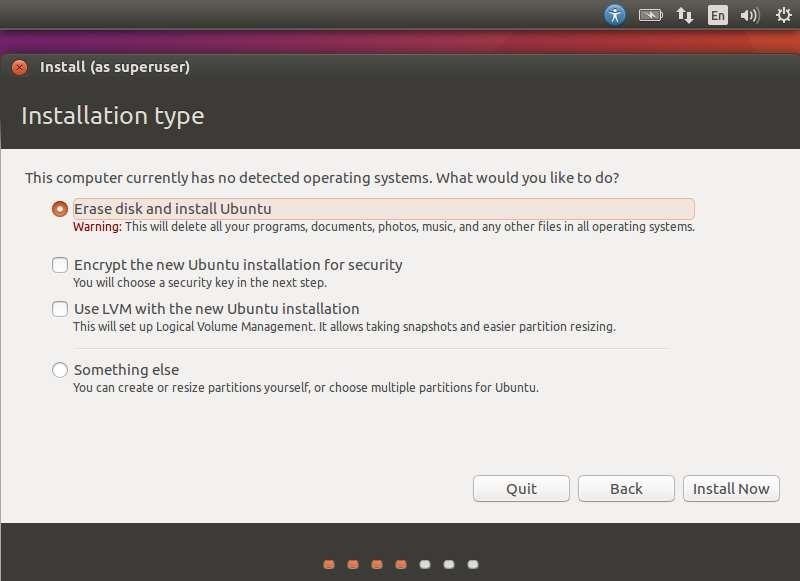
In the next screen, the following options are presented –
- The disk is erased and the installation is carried out. If there was another operating system
already on the disk, then Ubuntu would detect it and give the user the option to install the
operating system side by side. - There is an option to encrypt the installation. This is so that if anybody else were to steal the
data, they would not be able to decrypt the data. - Finally, Linux offers a facility called LVM, which can be used for taking snapshots of the disk.
For the moment, to make the installation simple, let’s keep the options unchecked and proceed with the installation by clicking the Install Now button.
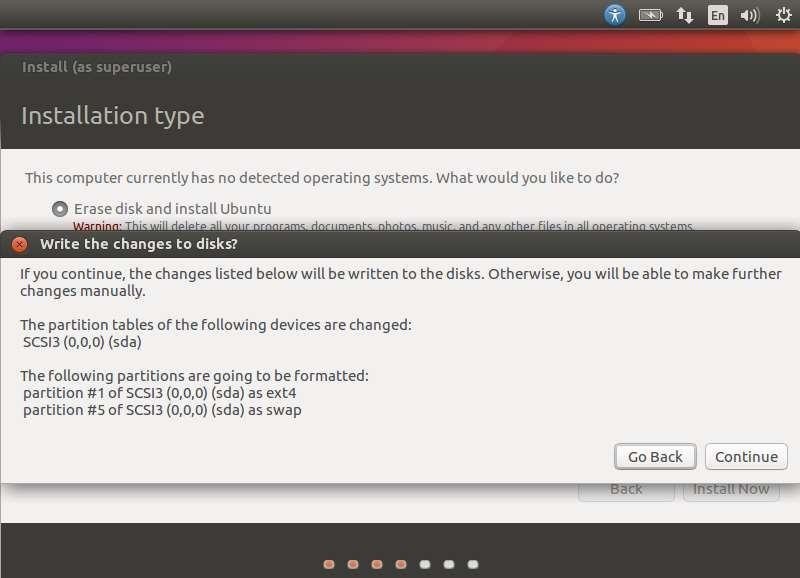
In the following screen, we will be prompted if we want to erase the disk. Click the Continue button
to proceed.
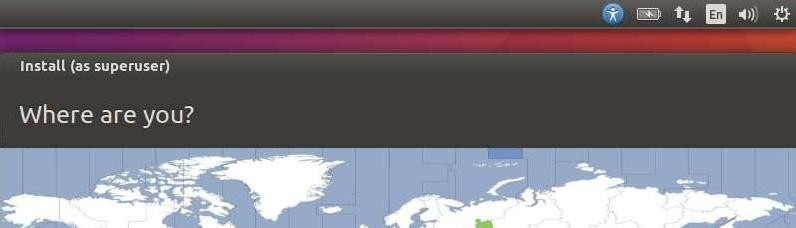
In next screen, we will be asked to confirm our location. Click the Continue button to proceed.
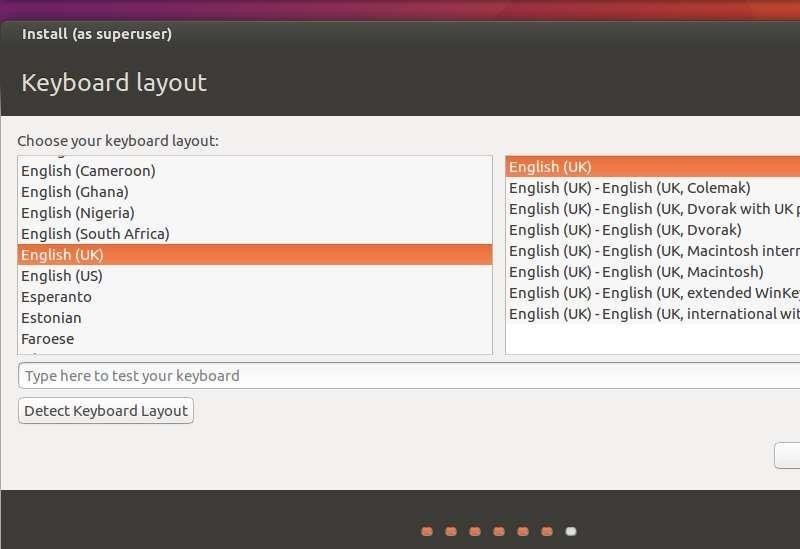
Now, we will be asked to confirm the language and the keyboard settings. Let us select English (UK)
as the preferred settings.
In the following screen, we will need to enter the user name, computer name and password which
will be used to log into the system. Fill the necessary details as shown in the following screenshot.
Then, click the continue button to proceed.

The system will now proceed with the installation and we will see the progress of the installation as
shown in the following screenshot.
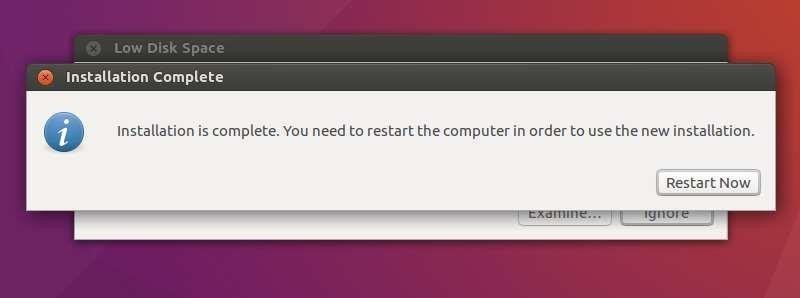
At the end of the installation, the system will prompt for a restart. Click the Restart Now to proceed.
When the installation is completed, we can login into the system. To do this, start the Virtual-Box
and select the VM and start it. The following screen will appear.
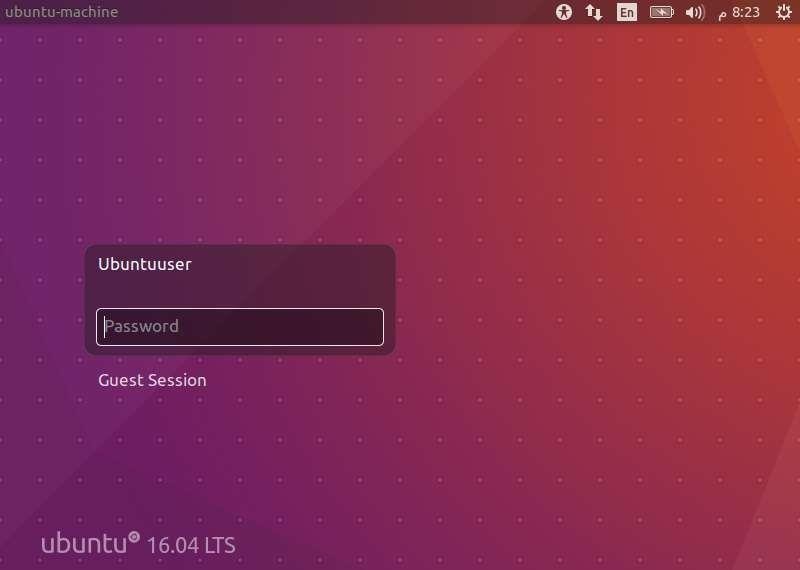
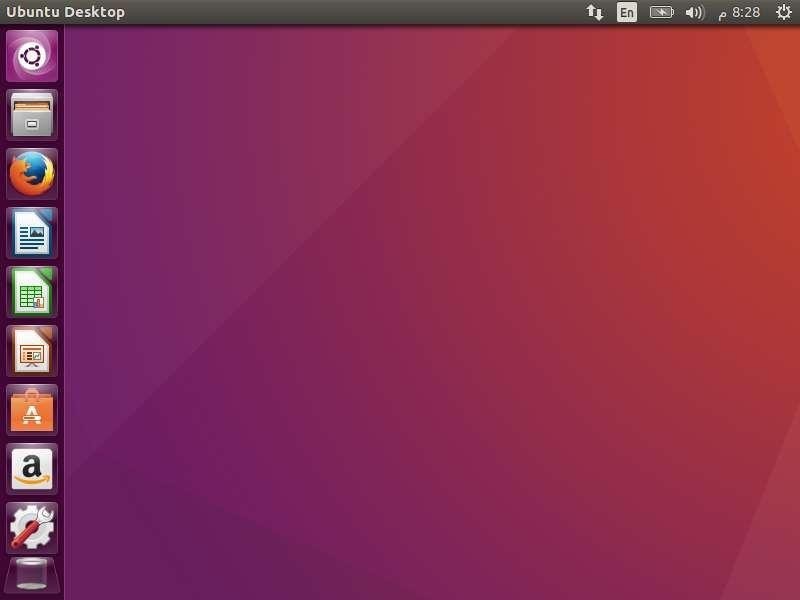
By entering username and password, we can login to the system and the following window will
appear
How to install Ubunto on VMWare Workstation 15 in Window 10
https://ubuntu.com/download/desktop
https://www.youtube.com/watch?v=QCSyqrgM0sU
Related Links to Operating System topics
Operating system Course content
- Operating System-Functions and History
- Generations of Operating System
- Functions of an Operating System
- Components of Operating System
- Types of Operating System
- Services of Operating System
- Properties of Operating System
- Processes in Operating System
- Process Scheduling in Operating System
Lab Practice Task
- Introduction to Linux Ubunto
- Installation with virtual Box
- Writing Linux Commands
- Navigation in File System and Directory Management in Ubunto using CLI
- File Handling and I/O Redirection In Ubunto
- File Access Permission in Linux
- Text Processing Tools and Basic System Configuration Tools in Linux
- Package Management in Linux
- How to manage processes in Linux
- Compiling and Executing C++ programs in Linux
- System Calls
- Introduction To Shell Programming
#Operating System complete course #Operating System past paper #Operating System-project #Computer Science all courses #operating system Problem with source code#University Past Paper #Programming language #Question paper #old paper #Operating System-Functions and History #Generations of Operating System #Functions of an Operating System #Components of Operating System #Types of Operating System #Services of Operating System #Properties of Operating System #Processes in Operating System #Process Scheduling in Operating System #Introduction to Linux Ubunto #Installation with virtual Box #Writing Linux Commands #Navigation in File System and Directory Management in Ubunto using CLI #File Handling and I/O Redirection In Ubunto #File Access Permission in Linux #Text Processing Tools and Basic System Configuration Tools in Linux #Package Management in Linux #How to manage processes in Linux #Compiling and Executing C++ programs in Linux #System Calls #Introduction To Shell Programming