Graphical User Interface – Layout Managers
Introduction:
In many other window systems, the user-interface components are arranged by using hardcoded pixel measurements. For example, put a button at location (10, 10) in the window using hard-coded pixel measurements, the user interface might look fine on one system but be unusable on another. Java’s layout managers provide a level of abstraction that automatically maps your user interface on all window systems.
The Java GUI components are placed in containers, where they are arranged by the container’s layout manager. In the preceding program, you did not specify where to place the OK button in the frame, but Java knows where to place it, because the layout manager works behind the scenes to place components in the correct locations. A layout manager is created using a layout manager class.
Layout managers are set in containers using the SetLayout(aLayoutManager) method. For example, you can use the following statements to create an instance of XLayout and set it in a container:
LayoutManagerlayoutManager = new XLayout(); container.setLayout(layoutManager);
Lab Activities:
Activity 1:
FlowLayout:
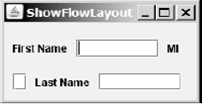
FlowLayout is the simplest layout manager. The components are arranged in the container from left to right in the order in which they were added. When one row is filled, a new row is started. You can specify the way the components are aligned by using one of three constants: FlowLayout.RIGHT, FlowLayout.CENTER, or FlowLayout.LEFT. You can also specify the gap between components in pixels. The class diagram for FlowLayout is shown in Figure below

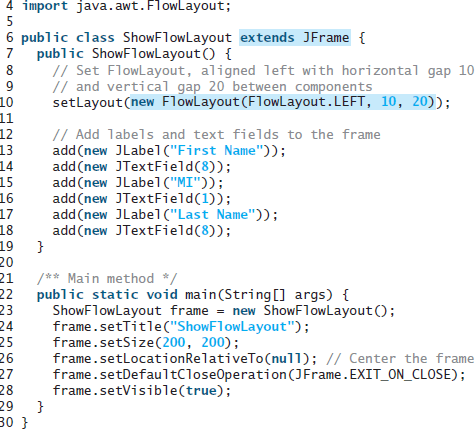
Create the following frame using Flow Layout.
Solution:
![]()
Activity 2:
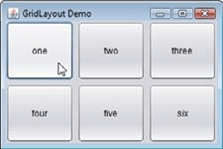
GridLayout:
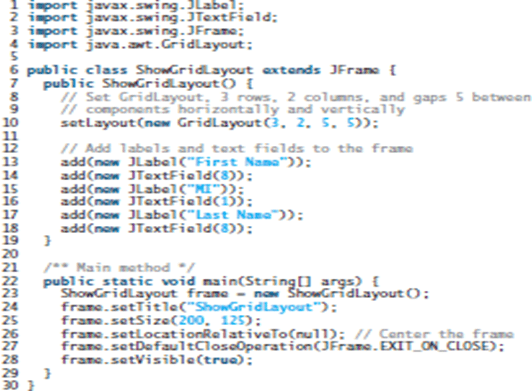
The GridLayout manager arranges components in a grid (matrix) formation. The components are placed in the grid from left to right, starting with the first row, then the second, and so on, in the order in which they are added. The class diagram for GridLayout is shown in Figure below.

Create the following frame using Grid Layout

Solution:
Activity 3:
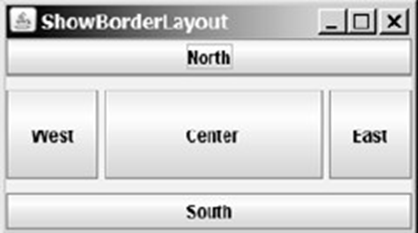
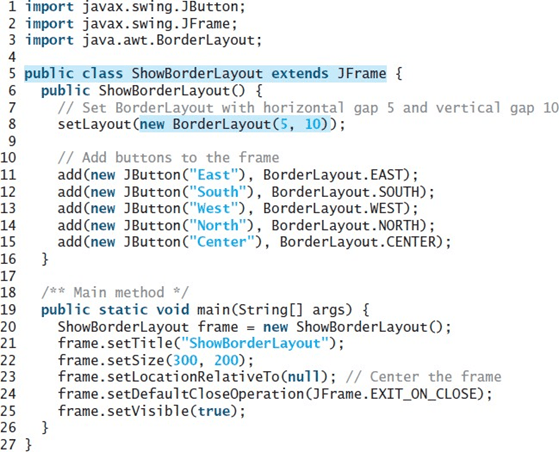
BorderLayout
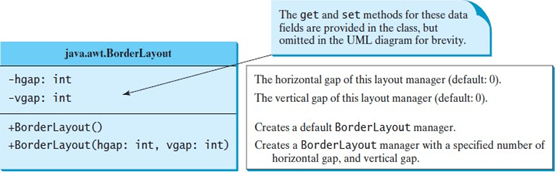
The BorderLayout manager divides a container into five areas: East, South, West, North, and Center. Components are added to a BorderLayout by using add(Component, index), where index is a constant as mentioned below:
- EAST,
- SOUTH,
- WEST,
- NORTH,
- CENTER.
The class diagram for BorderLayout is shown in Figure below:
Run the below code and ensure that the output matches the UI below the code.
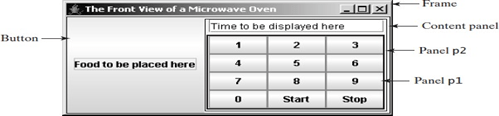
Panels as SubContainers
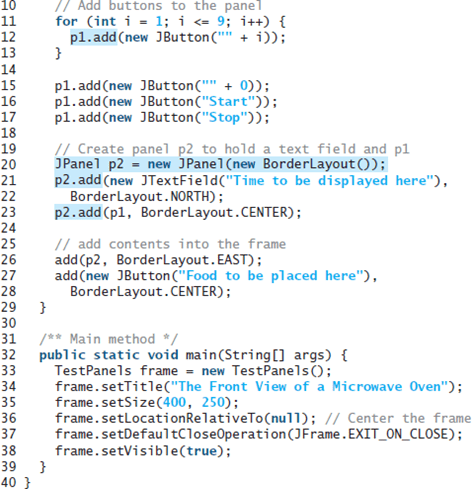
Suppose that you want to place ten buttons and a text field in a frame. The buttons are placed in grid formation, but the text field is placed on a separate row. It is difficult to achieve the desired look by placing all the components in a single container. With Java GUI programming, you can divide a window into panels. Panels act as subcontainers to group user-interface components.
You add the buttons in one panel, then add the panel into the frame. The Swing version of panel is JPanel. You can use new JPanel() to create a panel with a default FlowLayout manager or new JPanel(LayoutManager) to create a panel with the specified layout manager.
Use the add(Component) method to add a component to the panel. For example, the following code creates a panel and adds a button to it:
JPanel p = new JPanel(); p.add(new JButton(“OK”));
Panels can be placed inside a frame or inside another panel. The following statement places panel p into frame f:
f.add(p);
Run the below code and ensure that the output is similar to below:

Home Activities:
Activity 1:
Create the following GUI. You do not have to provide any functionality.

Activity 2:
Create the following GUI. You do not have to provide any functionality.

Assignment 1:
Create the following GUI. You do not have to provide any functionality.
Assignment 2:
Create the following GUI. You do not have to provide any functionality.

Assignment 3:
Create the following GUI. You do not have to provide any functionality.
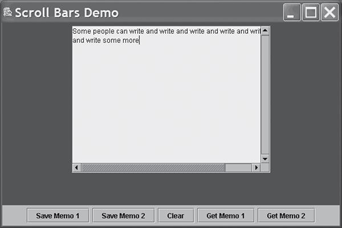
Note: Use JScrollPane class for the creating the scroll pane.